For all you DIY’s. I’ve done this myself and thought this was a great article that teaches you everything you need to know.
Step 1: Remove the Old Tub
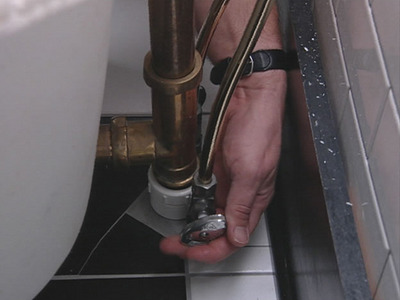
Begin by shutting off both hot and cold water supplies (Image 1).
Loosen and disconnect water supply lines and drain line.
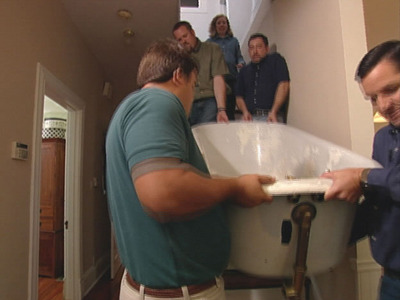
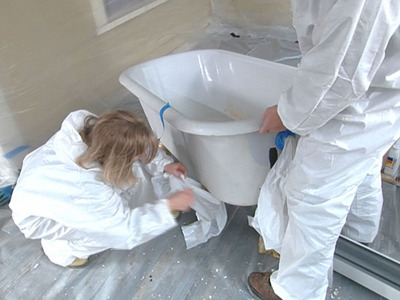
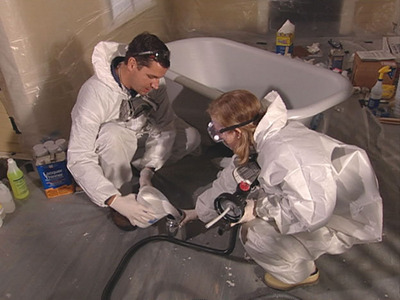
Remove the tub to the garage or well vented location. Because cast-iron tubs like this typically weigh from 250 to 400 pounds, this part of the job requires several helpers (Image 2).
Step 2: Prepare the Tub for Reglazing
For reglazing a tub, a respirator mask is required.
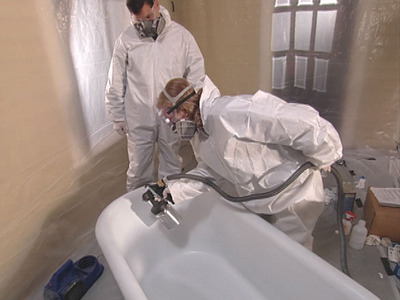
With the tub moved to a suitable work space, the stripping and re-glazing process can begin.
The key to a good tub-refinishing job is good preparation. Cover the work area in plastic drop-cloths to protect surfaces and furniture from strippers and re-glazing chemicals.
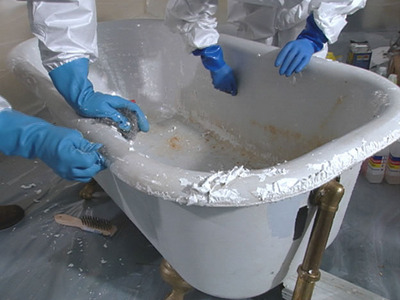
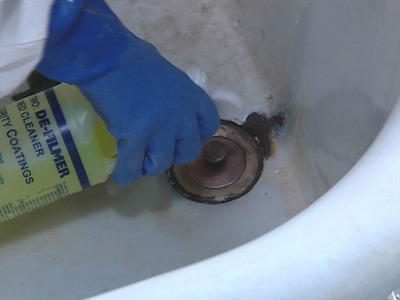
Carefully remove the valves (Image 1) as well as the pop-up or drain and overflow (if there is one).
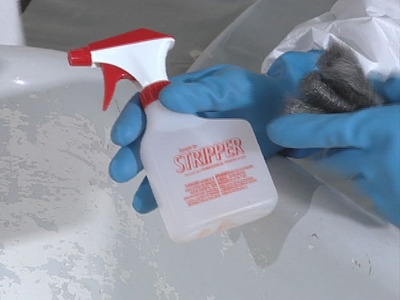
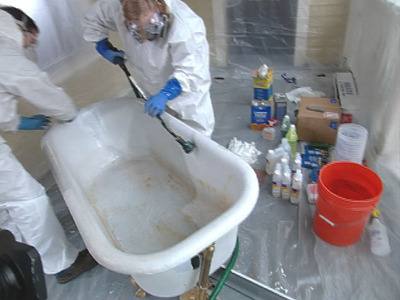
Since our tub surface had been painted with latex, a paint stripper was needed to remove all the old paint. Following the manufacturer’s instructions, spray on stripper using a pump sprayer (Image 2).
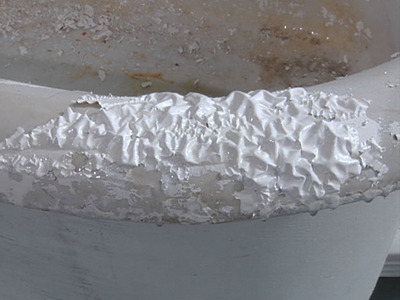
Wait for the paint to begin bubbling up (Image 3).
Scrub the loosened paint away with coarse steel wool (Image 4).
Depending on the paint, as many as two more applications of stripper may be needed.

Step 3: Use Acid-etch Cleaner
The next step of the process involves using methylene chloride — or lacquer thinner — which gives off strong fumes, so respirator masks are required from this point.
Go over the entire tub with lacquer thinner and coarse steel wool to remove any remnants of paint. After thoroughly scrubbing, rinse down the tub with water (Image 1).
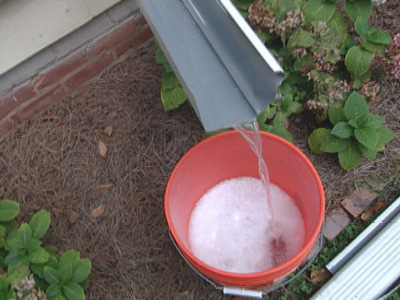
Important: Since the water runoff contains harmful chemicals, it’s critical that you drain the waste water into some type of receptacle that can be carefully disposed of. Check with your local authorities. For our project, we fashioned a makeshift drain using a spare piece of guttering that emptied into a plastic bucket (Image 2).
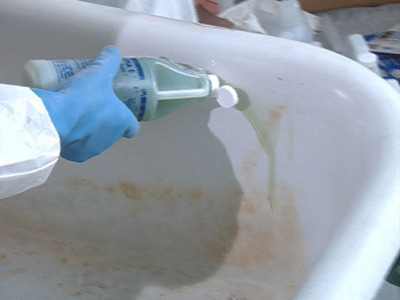
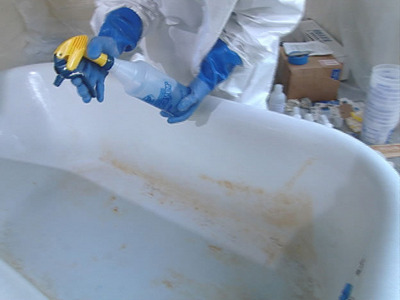
Next, use a chemical bonding agent that will react with the paint to form a tough, long-lasting, factory finish for porcelain and tile. Apply acid-etch cleaner to the top edge of the tub (Image 3) and allow it to run down over the surfaces. With a scouring pad or 240 grit sandpaper, scrub the tub with the acid-etch cleaner and then rinse.
Step 4: Degrease the Tub
You’re now ready to start the second step of the reglazing with the degreaser.
Add a little water to moisten the tub surface, and pour degreaser in the tub. This cleaner actually helped clean the corrosion and dirt from the copper drain.
Using another scouring pad, scrub away any residue.
Rinse with water.
Step 5: Use Adheser
To prepare for the next step, the adheser, cover any features of the tub that you won’t be painting. In our case, this meant covering the metal claw-feet.
The adheser is a bonding agent. Spray on a light film of the chemical adheser (Image 1).
Allow to set up according to the manufacturer’s instructions. In our case, the set-up time was 10 to 15 minutes. (Image 2)
Step 6: Apply Primer
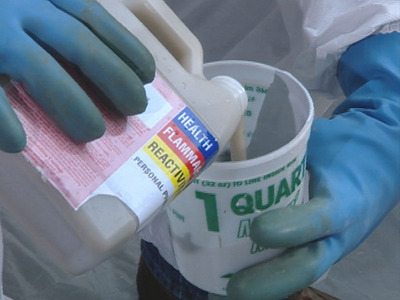
The next step is the primer. In our case the primer had to be mixed 1 part base to 2 parts reducer (Image 1). This makes it possible to use in a paint sprayer. Mix thoroughly before placing the mixture into the sprayer.
Using a paint-spray gun, prime the tub, inside and out, with three light coats of primer.
Allow each coat to tack up about 15 minutes before the next coat is applied.
Tip: When spraying, continually move the gun. Never allow it to set in one place (Image 2).
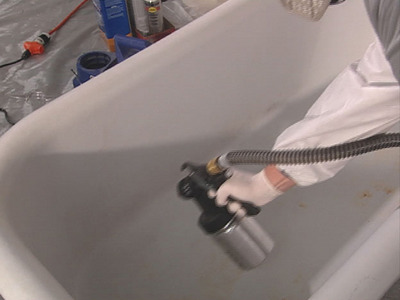
Step 7: Add Finish Coat
The finish coat of paint is next. In our case, to use the sprayer, we mixed together a ratio of 4 parts glossy-white base to one part catalyst and two parts reducer (or thinner). We then mixed thoroughly and poured the mixture into the spray reservoir (Image 1).
Again with a spray gun, apply three to four light coats of a final paint-coat (Image 2), allowing each coat to tack up about 15 minutes before the next coat is applied.
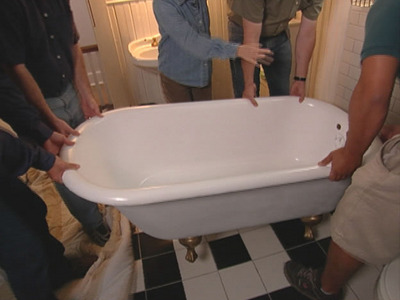
Once the paint is completely dry, move the tub back into the bathroom (Image 3), install the tub drain and reinstall the plumbing fixtures on refinished tub. Move into position to hookup water lines.
Step 8: Size and Cut Drain Pipe
Size and cut drain pipe. Slide the connections together and test.
Mark water line size. Use the pipe bender and form the bend to the fixture.
Hook up the compression fittings and test.
Step 9: Addional Tips on Re-Glazing a Tub
Do not use your reglazed tub for the specified number of days or hours recommended by the manufacturer — usually 24 hours.
Do not lay objects on your newly reglazed tub. Soap, washcloths, and shampoo bottles can ruin the finish.
Avoid abrasive cleansers. Use a spray cleaner along with a soft cloth. Wiping the tub down with a cloth after each use can also help maintain the finish.
Avoid bath mats with suction cups underneath.
Maintain caulking around the tub.
Some manufacturers recommend waxing your reglazed tub after it has been refinished and again every four months with a urethane polish. Check manufacturer specifications.